 Headlines
 Guided Tour
sourceAFRICA is a tool for organizing and working with large documents and document collections, a document viewer that makes it easier for reporters to share source material with readers and a publicly accessible repository of primary source documents that were used in journalists' investigations. If you're new to sourceAFRICA, here's a walkthrough to help you get your bearings.
Create your first project.
Use the "New Project" button on the left to create a project called "Demo Documents." Projects keep documents organized, allow you to restrict your searches to a limited group of documents and make it possible to collaborate on documents with other journalists.
Try a search of public documents.
Search for gulf oil spill.
This will search all documents made public by any sourceAFRICA user for any with "gulf," "oil" and "spill" in the text or title. You can refine your search by special criteria, as well. Your results should include a number of documents relating to the British Petroleum oil spill in the Gulf of Mexico. Drag one or two of these documents into your "Demo Documents" project.
Click on "Demo Documents" to open your project. You should see your documents listed there.
Make some notes.
Double-click one of your documents to open it. If the contributing reporter made public notes on the document, you'll see them here. You can make your own private notes on the document: those won't be visible to anyone but you.
Try our analytic tools.
sourceAFRICA gives journalists a great set of analytic tools for working with large and small documents. When a document is uploaded, we run it through OCR, which extracts letters and words from each document's image. But that's not all.
Search for source: "House Committee on the Judiciary".
Your results will include a handful of documents related to a DOJ report on Bush administration interrogation policies. Select all 8 of the interrogation documents and click the "Timeline" button:
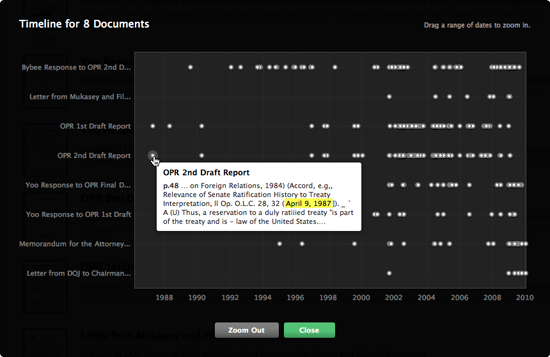
All of the dates named in these documents are plotted on a timeline. Hover over any dot to see the exact date, along with an excerpt of the text where the date is mentioned. Click on the dot to open a document viewer, jumping directly to the location of the date in the text.
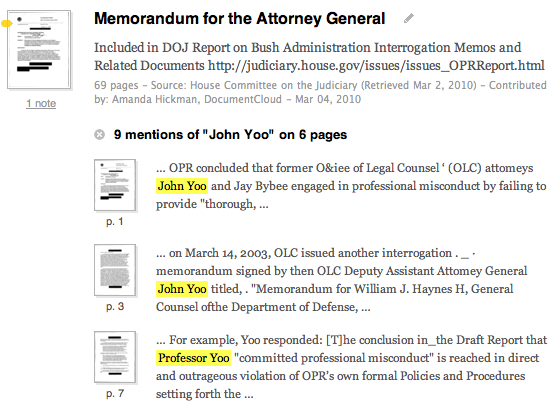
Close the timeline and click the "Entities" tab at the top left of the screen. This will show you a series of expandable lists of the people, organizations, places, and terms mentioned in the documents. You'll see "John Yoo" at the top of the list, with the counter (8) next to his name, because he's named in all eight of the documents. Click his name to refine your search, and then click the "show pages" link that appears right next to it. Underneath each document, you'll now see each page that contains a mention of John Yoo, along with an excerpt. Click on any of the thumbnails, or on the highlighted link, to jump directly to his name on that particular page.
Make sure you understand document privacy and get started uploading, annotating and publishing documents.
Questions? Don't hesitate to contact us. And as you go, feel free to request features and report bugs.